- HTML Canvas Tutorial
- HTML Canvas - Home
- HTML Canvas - Introduction
- Environmental Setup
- HTML Canvas - First Application
- HTML Canvas - Drawing 2D Shapes
- HTML Canvas - Path Elements
- 2D Shapes Using Path Elements
- HTML Canvas - Colors
- HTML Canvas - Adding Styles
- HTML Canvas - Adding Text
- HTML Canvas - Adding Images
- HTML Canvas - Canvas Clock
- HTML Canvas - Transformations
- Composting and Clipping
- HTML Canvas - Basic Animations
- Advanced Animations
- HTML Canvas API Functions
- HTML Canvas - Element
- HTML Canvas - Rectangles
- HTML Canvas - Lines
- HTML Canvas - Paths
- HTML Canvas - Text
- HTML Canvas - Colors and Styles
- HTML Canvas - Images
- HTML Canvas - Shadows and Transformations
- HTML Canvas Useful Resources
- HTML Canvas - Quick Guide
- HTML Canvas - Useful Resources
- HTML Canvas - Discussion
HTML Canvas - Composting and Clipping
We generally draw shapes on each other in the Canvas element when there is a need to draw more than one shape. We can use globalCompositeOperation property to order the composite shapes and there is another property clip which helps us to hide the non-required parts from the constructed shapes. The properties are mentioned below
globalCompositeOperation − By using this property, we can mask off existing shapes, draw new shapes on the existing ones, and clear sections. The values accepted by this property are mentioned in the below table.
Source-over |
Source-in |
Source-out |
Source-atop |
destination-over |
destination-in |
destination-out |
destination-atop |
lighter |
copy |
xor |
multiply |
screen |
overlay |
darken |
lighten |
color-dodge |
color-burn |
hard-light |
soft-light |
difference |
exclusion |
hue |
saturation |
color |
luminosity |
Example
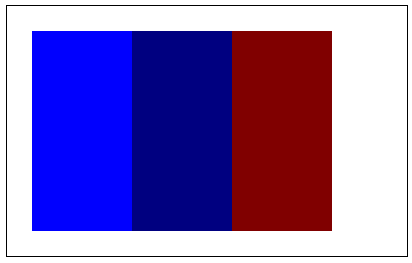
The following example implements the composting properties. The code is given below
<!DOCTYPE html>
<html lang="en">
   <head>
      <meta charset="UTF-8">
      <meta http-equiv="X-UA-Compatible" content="IE=edge">
      <meta name="viewport" content="width=device-width, initial-scale=1.0">
      <title> Composting </title>
   </head>
   <body onload="composting();">
      <canvas id="canvas" width="400" height="250" style="border: 1px solid black;"></canvas>
      <script>
         function composting() {
            var canvas = document.getElementById('canvas');
            var context = canvas.getContext('2d');
            context.fillStyle = 'blue';
            context.fillRect(25, 25, 200, 200);
            context.fill();
            context.globalCompositeOperation = 'darken';
            context.fillStyle = 'purple';
            context.fillRect(125, 25, 200, 200);
            context.fill();
            context.fillStyle = 'yellow';
            context.fillRect(225, 25, 100, 200);
            context.fill();
         }
      </script>
   </body>
</html>
Output
The output returned by the above code is
Clipping is similar to building shapes in canvas element using paths but it acts like a mask that removes unwanted parts of the obtained shape. The method used to achieve clipping is given below
Clip() − This method turns the built path shape into a clipping path. It is generally used instead of the closePath() function which turns it into a clipping path rather than stroking or filling the path.
Example for clipping
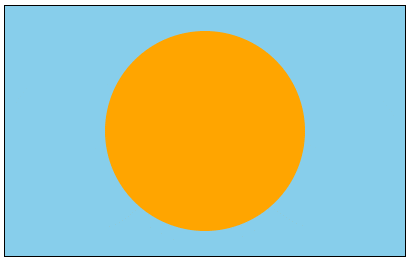
The following code implements the clipping method for the canvas element.
<!DOCTYPE html>
<html lang="en">
   <head>
      <title> Clipping </title>
   </head>
   <body onload="clipping();">
      <canvas id="canvas" width="400" height="250" style="border: 1px solid black;"></canvas>
      <script>
         function clipping() {
            var canvas = document.getElementById('canvas');
            var context = canvas.getContext('2d');
            context.fillStyle = 'skyblue';
            context.fillRect(0, 0, 400, 250);
            context.fill();
            context.beginPath();
            context.arc(200, 125, 100, 1 * Math.PI, 5 * Math.PI);
            context.fillStyle = 'orange';
            context.fill();
            context.clip();
         }
      </script>
   </body>
</html>
Output
The output for the above code formed is shown below −
To Continue Learning Please Login