- QTP Tutorial
- QTP - Home
- QTP - Introduction
- QTP - Test Automation
- QTP - Environment Setup
- QTP - Record and Play Back
- QTP - Object Repository
- QTP - Actions
- QTP - DataTables
- QTP - Checkpoints
- QTP - Synchronization
- QTP - Smart Identification
- QTP - Debugging
- QTP - Error Handling
- QTP - Recovery Scenarios
- QTP - Environment Variables
- QTP - Library Files
- QTP - Test Results
- QTP - GUI Objects
- QTP - Virtual Objects
- QTP - Accessing Databases
- QTP - Working with XML
- QTP - Descriptive Programming
- QTP - Automation Object Model
- QTP - Frameworks
- QTP - Designing a Framework
- QTP Useful Resources
- QTP - Questions and Answers
- QTP - Quick Guide
- QTP - Useful Resources
- QTP - Discussion
QTP - Record and Playback
Recording a test corresponds to recording the user actions of the application under test so that UFT automatically generates the scripts that can be played back. Record and Playback can give us the first impression of the tool, whether it can support the technology or not, if the initial settings are done correctly.
Steps for Record and Playback are as follows −
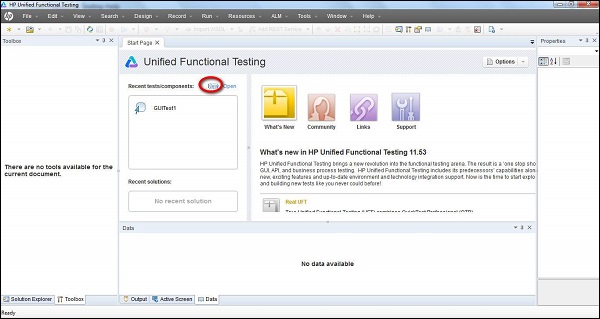
Step 1 − Click "New" test from the Start Page as shown below −
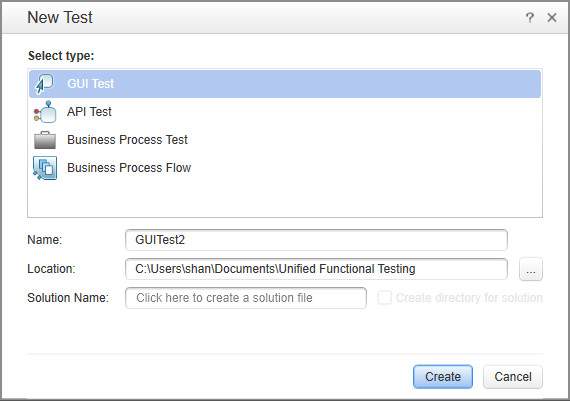
Step 2 − Clicking "New" Link, a new test window opens and the user needs to select the test type. Select "GUI Test", give a name for the test and the location where it needs to be saved.
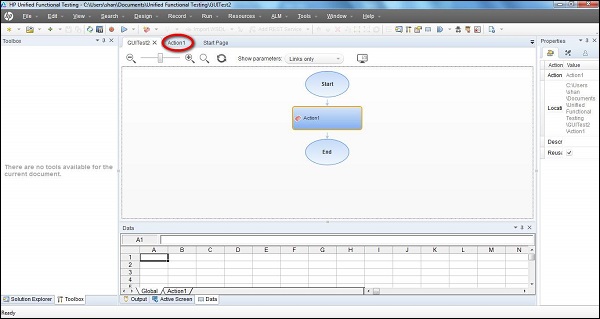
Step 3 − Once a New test is created, the new test screen opens as shown below. Now, click the "Action1" tab, which is created with 1 action by default.
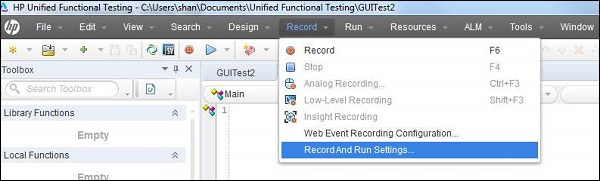
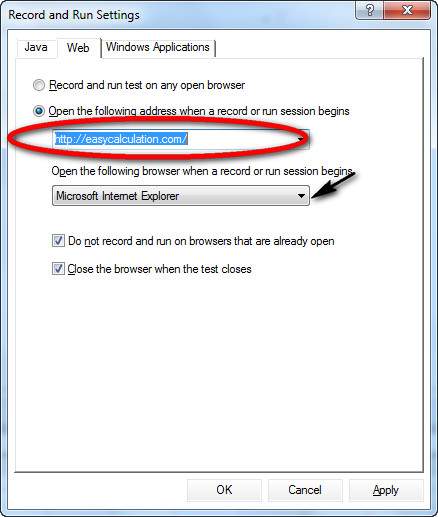
Step 4 − Click the "Record" Menu and select "Record and Run Settings" as shown below −
Step 5 − The Record and Run Settings dialog box opens and based on the type of application, one can select Web, Java, or Windows Applications. For Example, here, we will record a Web Based Application (http://easycalculation.com/).
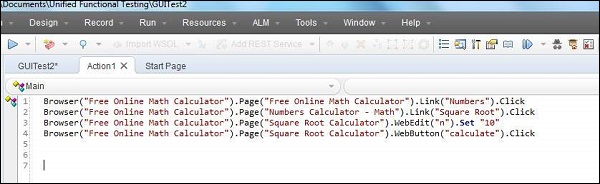
Step 6 − Click Record. The Internet Explorer opens automatically with the web address https://www.easycalculation.com/ as per the settings. Click the "Numbers" link under "Algebra" and key in a number and hit "Calculate". After completion of the action, click the "Stop" button in the record panel. You will notice that the script is generated as shown below −
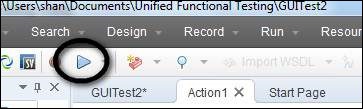
Step 7 − Now playback the script by clicking the playback button. The Script replays and the result is displayed.
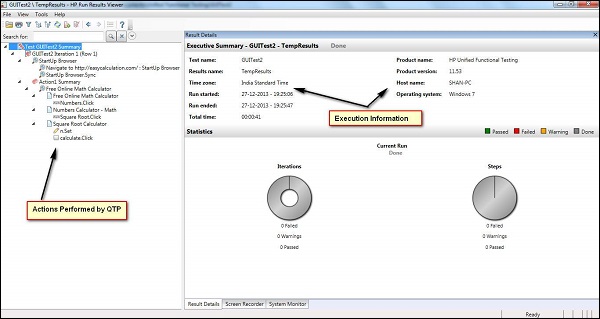
Step 8 − The result window is opened, by default, which exactly shows the timestamp of execution, pass and failed steps.
Significance of Record and Playback
It is used as the preliminary investigation method to verify if UFT can support the technology/application.
Used to create a test a basic functionality of an application or feature that does not require long-term maintenance.
It can be used for recording both mouse movements and keyboard inputs.
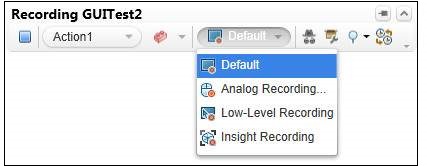
Modes of Recording
Normal Recording − This is the default Recording mode that records the objects and the operations performed on the application under test.
Analog Recording − This records not only the keyboard actions but also the mouse movements relative to the screen or the application window.
Low-Level Recording − This records the exact co-ordinates of the objects independent of the fact whether UFT recognizes the object or NOT. It just records the co-ordinates, hence does NOT record mouse movements.
Insight Recording − UFT records operations, based on its appearance and not based on its native properties.
How to Choose Recording Modes
After clicking the Recording button, the user can choose the recording mode from the recording pane that appears on the screen, once the recording starts. The selection can be made from any of the ones that has been discussed above.
You will see that the following scenario is recorded in all the modes and the same action has been recorded under various circumstances.
- Launch IE - https://www.easycalculation.com/
- Click "Numbers" under "Algebra"
- Click "Square Root" link
- Enter a value to calculate the square root. Let us say 10
- Hit Calculate
Script Recorded under Default, Analog and Low Level recording mode is given below −
' DEFAULT RECORDING MODE
Browser("Free Online Math Calculator").Page("Free Online Math
Calculator").Link("Numbers").Click

Browser("Free Online Math Calculator").Page("Numbers Calculator -
Math").Link("Square Root").Click

Browser("Free Online Math Calculator").Page("Square Root
Calculator").WebEdit("n").Set "10"

Browser("Free Online Math Calculator").Page("Square Root
Calculator").WebButton("calculate").Click

' ANALOG RECORDING MODE
Desktop.RunAnalog "Track1"

' LOW LEVEL RECORDING MODE
Window("Windows Internet Explorer").WinObject("Internet Explorer_Server").Click
235,395

Window("Windows Internet Explorer").WinObject("Internet Explorer_Server").Click
509,391

Window("Windows Internet Explorer").WinObject("Internet Explorer_Server").Click
780,631

Window("Windows Internet Explorer").WinObject("Internet Explorer_Server").Type
"10"

Window("Windows Internet Explorer").WinObject("Internet Explorer_Server").Click
757,666
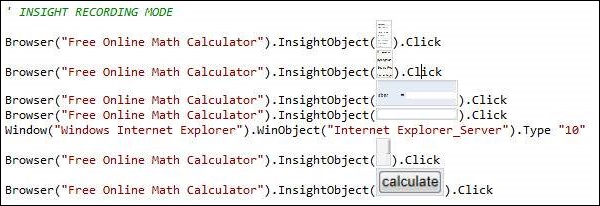
The recordings using insight recording mode will be as shown below −
To Continue Learning Please Login