- Matplotlib Basics
- Matplotlib - Home
- Matplotlib - Introduction
- Matplotlib - Vs Seaborn
- Matplotlib - Environment Setup
- Matplotlib - Anaconda distribution
- Matplotlib - Jupyter Notebook
- Matplotlib - Pyplot API
- Matplotlib - Simple Plot
- Matplotlib - Saving Figures
- Matplotlib - Markers
- Matplotlib - Figures
- Matplotlib - Styles
- Matplotlib - Legends
- Matplotlib - Colors
- Matplotlib - Colormaps
- Matplotlib - Colormap Normalization
- Matplotlib - Choosing Colormaps
- Matplotlib - Colorbars
- Matplotlib - Text
- Matplotlib - Text properties
- Matplotlib - Subplot Titles
- Matplotlib - Images
- Matplotlib - Image Masking
- Matplotlib - Annotations
- Matplotlib - Arrows
- Matplotlib - Fonts
- Matplotlib - What are Fonts?
- Setting Font Properties Globally
- Matplotlib - Font Indexing
- Matplotlib - Mathematical Expressions
- Matplotlib - Transforms
- Matplotlib - Ticks and Tick Labels
- Matplotlib - Axis Ranges
- Matplotlib - Axis Scales
- Matplotlib - Axis Ticks
- Matplotlib - Formatting Axes
- Matplotlib - Axes Class
- Matplotlib - Twin Axes
- Matplotlib - Figure Class
- Matplotlib - Multiplots
- Matplotlib - Grids
- Matplotlib - Object-oriented Interface
- Matplotlib - PyLab module
- Matplotlib - Subplots() Function
- Matplotlib - Subplot2grid() Function
- Matplotlib - Anchored Artists
- Matplotlib - Manual Contour
- Matplotlib - Coords Report
- Matplotlib - AGG filter
- Matplotlib - Ribbon Box
- Matplotlib - Fill Spiral
- Matplotlib - Findobj Demo
- Matplotlib - Hyperlinks
- Matplotlib - Image Thumbnail
- Matplotlib - Plotting with Keywords
- Matplotlib - Create Logo
- Matplotlib - Multipage PDF
- Matplotlib - Multiprocessing
- Matplotlib - Print Stdout
- Matplotlib - Compound Path
- Matplotlib - Sankey Class
- Matplotlib - MRI with EEG
- Matplotlib - Stylesheets
- Matplotlib - Background Colors
- Matplotlib - Basemap
- Matplotlib Event Handling
- Matplotlib - Event Handling
- Matplotlib - Close Event
- Matplotlib - Mouse Move
- Matplotlib - Click Events
- Matplotlib - Scroll Event
- Matplotlib - Keypress Event
- Matplotlib - Pick Event
- Matplotlib - Looking Glass
- Matplotlib - Path Editor
- Matplotlib - Poly Editor
- Matplotlib - Timers
- Matplotlib - Viewlims
- Matplotlib - Zoom Window
- Matplotlib Plotting
- Matplotlib - Bar Graphs
- Matplotlib - Histogram
- Matplotlib - Pie Chart
- Matplotlib - Scatter Plot
- Matplotlib - Box Plot
- Matplotlib - Violin Plot
- Matplotlib - Contour Plot
- Matplotlib - 3D Plotting
- Matplotlib - 3D Contours
- Matplotlib - 3D Wireframe Plot
- Matplotlib - 3D Surface Plot
- Matplotlib - Quiver Plot
- Matplotlib Useful Resources
- Matplotlib - Quick Guide
- Matplotlib - Useful Resources
- Matplotlib - Discussion
Matplotlib - Menu Widget
Introduction
In Matplotlib library we do not have a specific Menu Widget, in its core functionality while as there is no built-in menu widget but we can achieve similar functionality by combining Matplotlib with other libraries like Tkinter or PyQt.
Here we will see the overview of creating a simple menu using Tkinter along with Matplotlib for plotting. Tkinter is a standard GUI i.e. Graphical User Interface library for Python and it can be used to create interactive menus and windows.
Overview of Creating a Menu in Matplotlib with Tkinter
The below are the key points of creating a menu in matplotlib library by using the Tkinter library.
Tkinter Integration
Tkinter is a powerful GUI library that integrates well with Matplotlib. We use Tkinter to create the main application window, menus and handle user interactions.
Matplotlib Figure and Canvas
The Matplotlib figure and canvas are embedded into the Tkinter application using FigureCanvasTkAgg. This allows Matplotlib plots to be displayed within a Tkinter window.
Menu Creation
We create a menu bar using tk.Menu() and add various menu items with associated actions. Here we are using the menu items such as Open and Exit under the File menu and Plot Data under the Plot menu.
Menu Actions
Functions like open_file and plot_data are defined to specify the actions associated with each menu item. For example the Open menu item invokes a file dialog to open a file and the Plot Data menu item plots a simple line on the Matplotlib axes.
Menu Cascades
Menu cascades are created using add_cascade(). This allows us to organize related menu items under a common menu header.
Running Tkinter Main Loop
The root.mainloop() call starts the Tkinter main loop where the application waits for user interactions.
Steps for creating the Menu widget using Tkinter
The following are the steps to be followed for creating the menu widget in matplotlib library using the Tkinter library.
Importing Necessary Libraries
First we have to import Matplotlib library for plotting and Tkinter library for GUI components by using the below line code.
import tkinter as tk
from tkinter import filedialog
import matplotlib.pyplot as plt
from matplotlib.backends.backend_tkagg import FigureCanvasTkAgg
Creating a Tkinter Application
After importing the required libraries we have to create a Tkinter application and set up the main window.
import tkinter as tk
from tkinter import filedialog
import matplotlib.pyplot as plt
from matplotlib.backends.backend_tkagg import FigureCanvasTkAgg
root = tk.Tk()
root.title("Matplotlib Menu Widget")
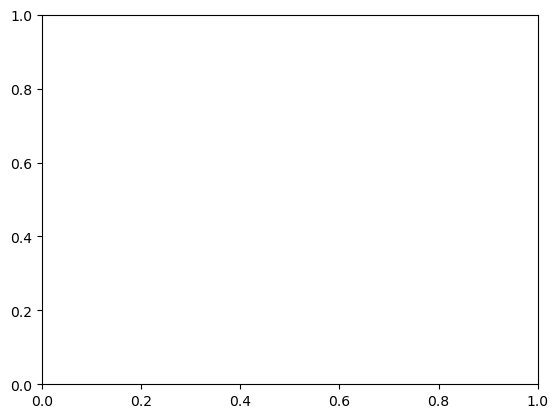
Creating a Matplotlib Figure and Axes
After that we have to create a Matplotlib figure and axes within the Tkinter application by using the below lines of code.
Example
import tkinter as tk
from tkinter import filedialog
import matplotlib.pyplot as plt
from matplotlib.backends.backend_tkagg import FigureCanvasTkAgg
root = tk.Tk()
root.title("Matplotlib Menu Widget")
fig, ax = plt.subplots()
canvas = FigureCanvasTkAgg(fig, master=root)
canvas_widget = canvas.get_tk_widget()
canvas_widget.pack(side=tk.TOP, fill=tk.BOTH, expand=1)
Output
Defining Menu Actions
In this step we have to define functions that will be triggered when menu items are selected.
def open_file():
file_path = filedialog.askopenfilename(title="Open File", filetypes=[("Text Files", "*.txt")])
# Add your file processing logic here
print(f"File opened: {file_path}")
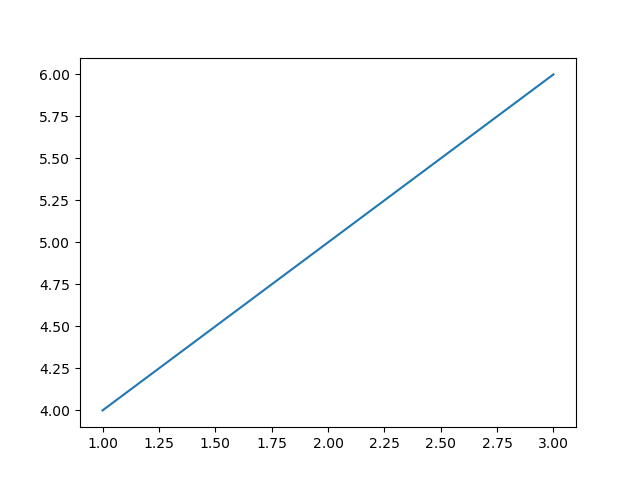
def plot_data():
# Add your data plotting logic here
ax.plot([1, 2, 3], [4, 5, 6])
canvas.draw()
Creating a Menu and Running the Tkinter Main Loop
Next we have to create a menu bar and add menu items with associated actions and then run the Tkinter main loop to display the GUI.
Now let’s combine the entire defined steps together and frame the menu widget using the tkinter library.
Example
%matplotlib
import tkinter as tk
from tkinter import filedialog
import matplotlib.pyplot as plt
from matplotlib.backends.backend_tkagg import FigureCanvasTkAgg
root = tk.Tk()
root.title("Matplotlib Menu Widget")
canvas = FigureCanvasTkAgg(fig, master=root)
canvas_widget = canvas.get_tk_widget()
canvas_widget.pack(side=tk.TOP, fill=tk.BOTH, expand=1)
def open_file():
   file_path = filedialog.askopenfilename(title="Open File", filetypes=[("Text Files", "*.txt")])
   # Add your file processing logic here
   print(f"File opened: {file_path}")
def plot_data():
   # Add your data plotting logic here
   fig, ax = plt.subplots()
   ax.plot([1, 2, 3], [4, 5, 6])
   canvas.draw()
menu_bar = tk.Menu(root)
file_menu = tk.Menu(menu_bar, tearoff=0)
file_menu.add_command(label="Open", command=open_file)
file_menu.add_separator()
file_menu.add_command(label="Exit", command=root.destroy)
plot_menu = tk.Menu(menu_bar, tearoff=0)
plot_menu.add_command(label="Plot Data", command=plot_data)
menu_bar.add_cascade(label="File", menu=file_menu)
menu_bar.add_cascade(label="Plot", menu=plot_menu)
root.config(menu=menu_bar)
root.mainloop()
Output
With menu widget
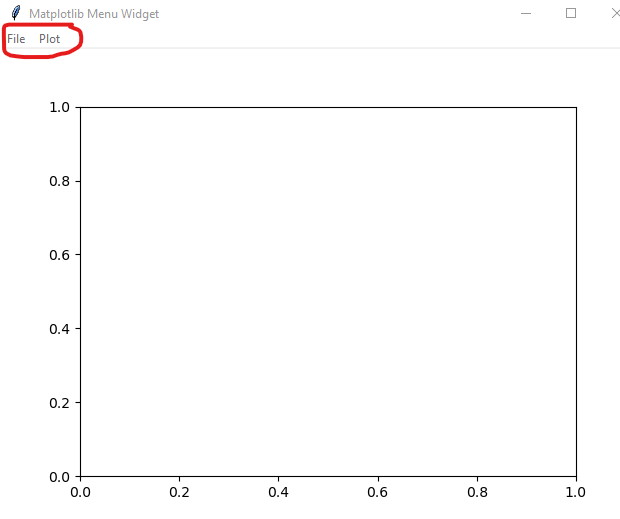
Display of plot info
Use Cases
The following are the use cases of the menu widget of the matplotlib library using Tkinter library.
File Operations − Use the menu to open files, save plots or perform various file-related operations.
Plotting Options − Provide options in the menu to trigger different types of plots or visualize different datasets.
Custom Actions − Implement custom actions in the menu for specific tasks relevant to our application.
Integration with Matplotlib Widgets − Combine the menu with other Matplotlib widgets for more interactive visualizations.
Customization
Menu Appearance − Customize the appearance of menus, menu items and cascades using options like tearoff, font, background and foreground.
Integration with Matplotlib Styles − We can integrate Matplotlib styles to maintain a consistent appearance across our Matplotlib plots and Tkinter GUI.
To Continue Learning Please Login